I recently launched THE PURPLE COFFEE PODCAST to help kick my story telling to new heights. I’m aware the world doesn’t need another podcast, but seen as I’ve spent the last two years interviewing inspiring entrepreneurs, and urged them to share story telling awesomeness, I figured why not!
Until now, I’ve shared an interview here and an interview there, which is a shit way of approaching life. The Purple Coffee Podcast ensures I stay consistent, and also gives me reason to re-interview some of my favourite chaps and chappettes. If you’ve yet to Listen / Watch any sessions, I urge you to do so – because I’d love your feedback.
However, this post is about HOW I set up the The Purple Coffee Podcast. So, without further ado, here we go…
**A quick heads up – most of the links below are affiliate ones, which means I make a small commission on any sales. This does not affect you in any way, merely provides me extra money to buy Kid Turndog shoes and cute little hats (that he never ever wears!)**
WELCOME TO A STORY TELLING MISFIT TALE
The first step in making The Purple Coffee Podcast is to capture the actual footage. In general this is broken down into two parts:
- OPENING & CLOSING SCENES
- THE INTERVIEW ITSELF
Different tools and approaches are used for both, and as both are vital in the story telling process, let’s split things straight down the middle:
OPENING & CLOSING SCENES
Each Podcast Session begins and ends with me in front of the camera: chatting about life and the upcoming interview, and anything else of relevance. In the past, when I’ve shared interviews, I’ve shared ONLY the interview, which is rather stale and boring. I can’t say I wake up in the morning and say, “let’s be stale and boring today, Turndog.” – so why I took this approach with my interviews is beyond me. **DISCLAIMER – sometimes I do speak in third person and refer to myself as Turndog. It’s an issue I’m working on** However, because The Purple Coffee Podcast is shared in both Video & Audio versions, it isn’t as easy as sitting in front of the computer with a microphone in hand. That isn’t to say it’s difficult, however, and these are the tools I use:
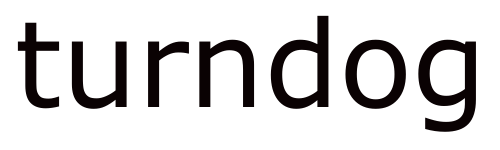
CANON 600D
THE CANON 600D![]() is my current DSLR camera, and is a great entry level piece of kit for photography and videography. It has its limitations, but for capturing the kind of footage I do before for the podcast, it’s perfect. Super light. Super portable. Super cool-cats indeed.
is my current DSLR camera, and is a great entry level piece of kit for photography and videography. It has its limitations, but for capturing the kind of footage I do before for the podcast, it’s perfect. Super light. Super portable. Super cool-cats indeed.
You do need to consider the lens as well, but again, for a simple piece of video like this, the standard kit-lens that comes with your camera is more than enough. As I acquire new equipment over time, I’m sure this will reflect in the podcast. For now, everything is kept ultra simple!
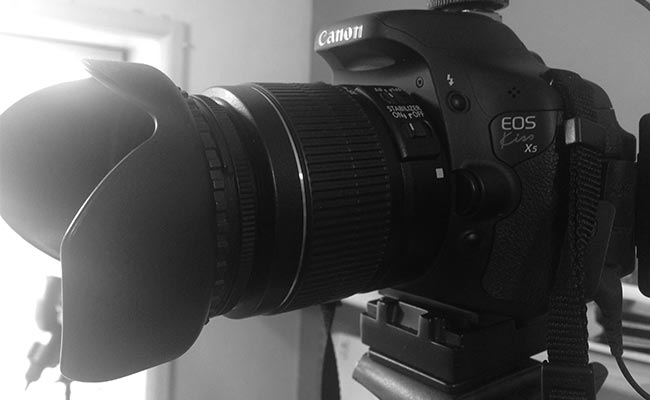
RODE VIDEO MIC PRO
![]() I love THE RODE VIDEO MIC PRO, and I can’t wait to add a few more to my story telling arsenal. It connects to the top of your camera, but is also light and portable enough to be placed on a boom pole, a table stand, or duct-taped to the wall (yes, I’ve done that before). The audio from the Canon 600D is poor, so an external microphone is a must. In fact, no matter what camera you use, an external mic should always been considered!
I love THE RODE VIDEO MIC PRO, and I can’t wait to add a few more to my story telling arsenal. It connects to the top of your camera, but is also light and portable enough to be placed on a boom pole, a table stand, or duct-taped to the wall (yes, I’ve done that before). The audio from the Canon 600D is poor, so an external microphone is a must. In fact, no matter what camera you use, an external mic should always been considered!
Although you can get cheaper than the Rode Pro, better value for money is difficult to find. I love this adorable monster, and I can’t imagine life without it. I know, I’m sad and need a girlfriend.
BLANK WALL & NATURAL LIGHTING
In terms of tools, that’s all I use. I’m lucky to have a blank wall in my room, so I stand against this, let some natural sunlight through the blinds, and play with the camera settings (like white balance and ISO) until I’m happy with the look and feel. I tend to shoot during the day, which helps a great deal. And I have a simple Lighting Setup that does come in handy from time-to-time (If I shoot at night or in the evening). However, I get over most obstacles during post production, which I’ll explain soon.

THE INTERVIEW ITSELF
This is where the magic happens, and although I do record some local interviews (where I use a similar setup to the above), most are done via Skype. I discuss the full ins and outs of Skype-Interviewing in my short and practical book: THE SKYPE INTERVIEWING STARTER-KIT. If you are interested in a more detailed approach, this book may be ideal. Otherwise, here’s a peek into the tools I use to capture and record my story telling interviews:
SKYPE
![]() In my opinion, SKYPE is one of the greatest inventions mankind has ever accomplished. To connect people across the globe for FREE is a remarkable feat, and I for one am VERY grateful. I’d say 90% of my interviews are done via Skype, and many are with entrepreneurs thousands of miles away. It’s a true game changer, but does have one fatal floor.
In my opinion, SKYPE is one of the greatest inventions mankind has ever accomplished. To connect people across the globe for FREE is a remarkable feat, and I for one am VERY grateful. I’d say 90% of my interviews are done via Skype, and many are with entrepreneurs thousands of miles away. It’s a true game changer, but does have one fatal floor.
You CANNOT record your interviews with Skype alone. This requires some additional software, but don’t worry, I’ve got you covered.
ECAMM CALL RECORDER
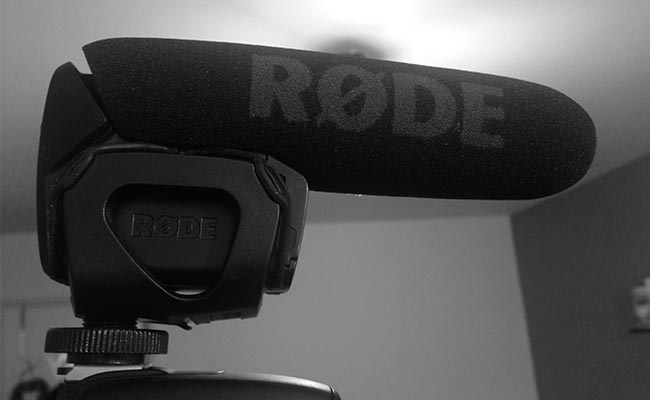
CALL RECORDER![]() from Ecamm is an amazing (and super affordable) plugin that integrates effortlessly within Skype. Simply download, open Skype, and when you’re ready to record your interview, press the red button. There’s some great settings you can customise, too, with arguably the biggest feature its Split Screen Option.
from Ecamm is an amazing (and super affordable) plugin that integrates effortlessly within Skype. Simply download, open Skype, and when you’re ready to record your interview, press the red button. There’s some great settings you can customise, too, with arguably the biggest feature its Split Screen Option.
This is what I use for The Purple Coffee Podcast, and it makes editing and sharing your interviews a breeze. Quality can sometimes be an issue, but your broadband/wifi connection usually dictates this. In other words, if you want great quality, make sure your internet speed is pretty darn fast. Again, this is discussed in more detail within THE SKYPE INTERVIEWING STARTER-KIT.
…
THESE ARE THE SETTINGS I USE:
THE SETTINGS I USE FOR CALL RECORDER WITHIN THE SKYPE PREFERENCES PANEL
BLUE SNOWBALL MICROPHONE
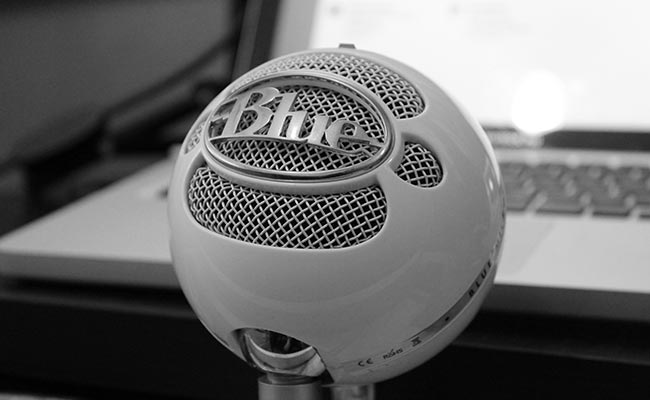
![]() Like the in-built camera audio, your laptop microphone is next to useless. If you’re going to create a podcast, please invest in an external microphone (if this is all you invest in). The difference it makes is HUGE, and although there are many great options out there, the one I use is THE BLUE SNOWBALL.
Like the in-built camera audio, your laptop microphone is next to useless. If you’re going to create a podcast, please invest in an external microphone (if this is all you invest in). The difference it makes is HUGE, and although there are many great options out there, the one I use is THE BLUE SNOWBALL.
It’s small, compact, and built like a tank. And when it comes to quality, I have no complaints. Simply connect it to your laptop via USB, open Skype Preferences, toggle to the Audio/Video section, and ensure it uses your External Mic instead of the in-built one. For the money, this mic is amazing!
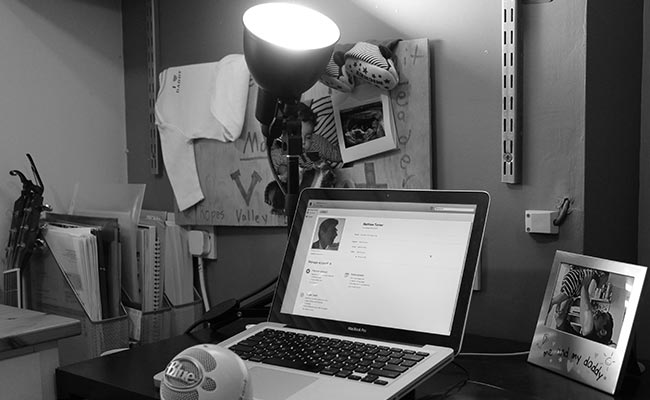
LIGHTING & AUDIO
Overall, these are the tools I use to capture 90% of my interviews. However, there are two other tips I have for you, which can make all the difference during post production.
The first is to use headphones (I use some old Apple Ear Buds), because if you don’t, your microphone may pick up echo and distortion. I’ve had some great interviews ruined because of this, so always ensure you have headphones close to hand.
The second is to keep a desk lamp (ideally one with a daylight lightbulb) near by, because if you’re anything like me, your interviews will occur at various times in the day. If you have natural light, use it, but if your interview is at night, you NEED a lamp to help bring out your features. Again, I talk more about this more in THE SKYPE INTERVIEW STARTER-KIT.
EDIT YOUR STORY TELLING MASTERPIECE
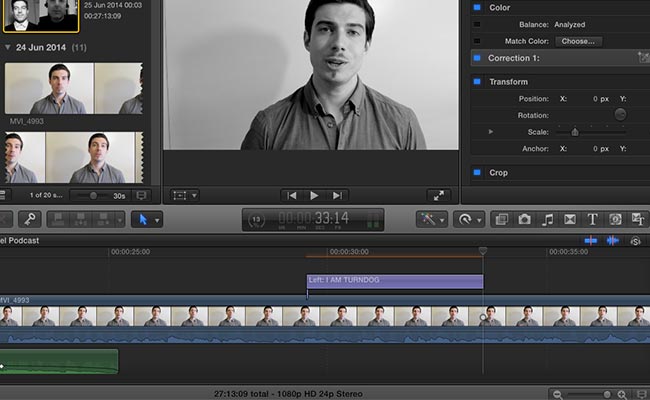
Okay, I’ve gathered all my footage, and now I need to edit it together. If I released an Audio Only Podcast, I’d use something like Audacity or Garageband, but because I release both a Video & Audio version, I edit everything in FINAL CUT PRO X. At first, this editing software scared the bejebus out of me, but it’s much more user friendly than it initially lets on.
Don’t get me wrong, Final Cut can do EVERYTHING, but for a simple podcast like mine, I only scratch the surface. My minimal approach is on purpose, because not only does it save time and stress, but ensures I don’t get carried away with effects and other things that can bog down the story telling process.
With this minimal approach in mind, here are a few things I do:
BLACK & WHITE
I shoot all of my personal videos in black and white. My main reason for doing this is because I like Black & White Videos. I think it aligns with my style, and when every video on the internet are in colour, mine stand out a little.
Another, more practical reason, is because shooting in Black & White is MUCH easier to execute. It’s forgiving when it comes to lighting and colour, so when you want to minimise the editing process as much as possible (and/or you have little equipment to work with) getting rid of colour makes a big difference.
This certainly kills two bird with one stone 🙂
INTRO MUSIC
My intro music is from The Lions Rampant, and my good buddy, Stu Mckenzie. Both the music and animation (which I made myself in Final Cut Pro) is always in a handy folder, so I can drag it into a project whenever I like. Again, this is a time saver, so be sure to keep any music or animations in a separate folder, rather than trying to recreate them from scratch each time.
LESS IS MORE
You may notice The Purple Coffee Podcast has few effects, animations, transitions, and titles. Well, this is on purpose, because I want focus to be on the interview, and the story telling goodness taking place. Isn’t it amazing how powerful nothing can be?
EXPORT YOUR STORY TELLING MASTERPIECE
Again, because I release both a Video & Audio version, I edit everything in Final Cut Pro, before exporting a separate file of each. Overall, this is a simple process, but here’s a quick step-by-step guide:
STEP 1
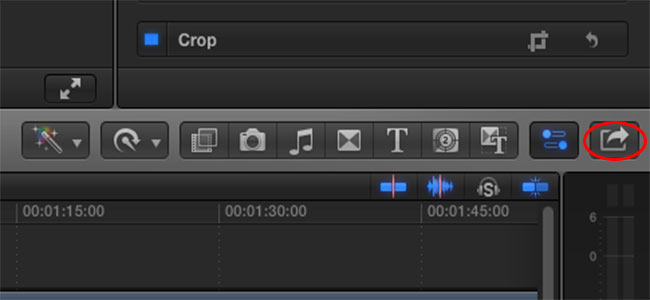
Once you’ve finished your episode and you’re ready to export your file, click the EXPORT MENU on the far right of the page. This brings up a menu, including ‘Upload to Youtube’, ‘Upload to Vimeo’ etc… I PRESS THE EXPORT FILE option, which takes you to the next window…
STEP 2
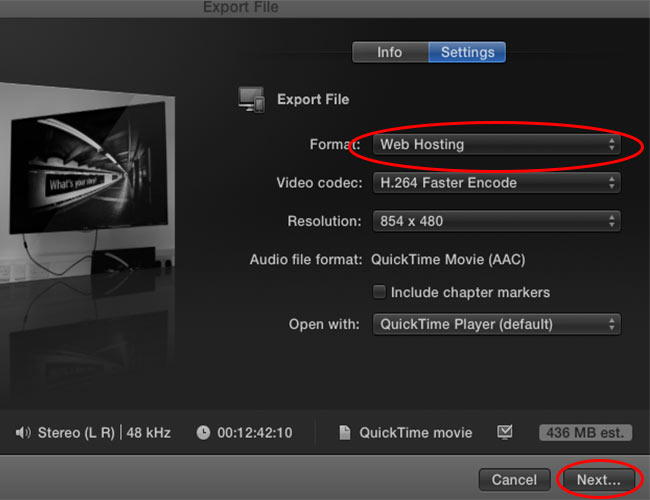
To start with, I create the VIDEO FILE, and there are several formats to choose from. I tend to use the WEB HOSTING option, as this creates the smallest file. You can alter several settings, and once happy, CLICK NEXT and SAVE THE FILE to your computer or hard drive.
STEP 3
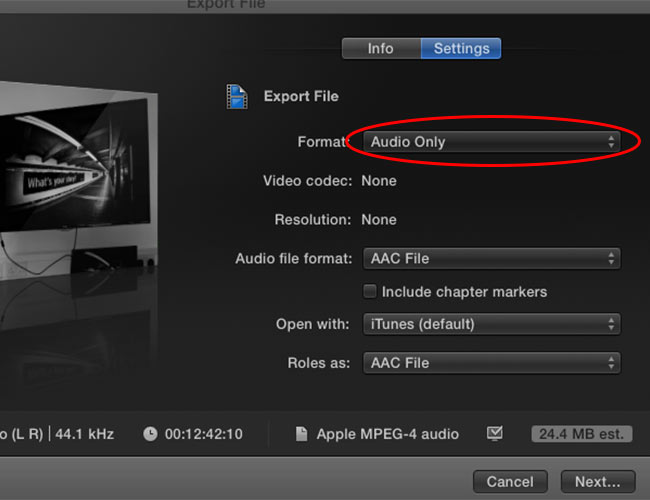
Once the video file is saved, I REPEAT STEP 1, only this time I choose the AUDIO ONLY format, and CLICK NEXT and SAVE THE FILE to my computer.
Like I say, there are several settings to choose from, and depending on the project, I often change and tinker with these. However, for The Purple Coffee Podcast, these are the settings I tend to use.
COMPRESSING YOUR FILES
I don’t always have to do this, but Final Cut Pro tends to create rather large files. On my current plan for Vimeo & Libsyn (more on them soon), I’m limited to how much I can upload. As such, sometimes I have to compress the files, which I know sounds bad.
I was a sceptic at first, too, but once I compared the before and after files (for both audio and video), I found no difference at all. I’m no expert, so I’m sure some details are lost, but for internet use where the majority of people will watch/listen on phones and laptops, any loss of quality is minimal.
As such, these are the tools I use to Compress My Video & Audio files:
HANDBRAKE (VIDEO)
HANDBRAKE IS FREE![]() , and easy peasy to use. Drag your file into the program, customise any of the settings you like (although I tend to stick to the out-of-the-box options), and press compress. The result? A 450MB file transforms into a 150MB file!
, and easy peasy to use. Drag your file into the program, customise any of the settings you like (although I tend to stick to the out-of-the-box options), and press compress. The result? A 450MB file transforms into a 150MB file!
AUPHONIC (AUDIO)
![]() Another FREE tool, AUPHONIC, does the same as above. Upload your original file (mine are usually around 20MB), press compress, make a cup of tea, and return to a smaller file.
Another FREE tool, AUPHONIC, does the same as above. Upload your original file (mine are usually around 20MB), press compress, make a cup of tea, and return to a smaller file.
Auphonic is also good for other reasons, mainly the ability to create Podcast friendly files (with Meta Data). I may create a separate Blog Post about this in the future, but it’s an area I’m still learning about – and depending on the type of podcast you produce, the bitrate you can use (which makes a big difference to your file size) varies.
If you’d like me to do a separate post on this, be sure to hit me up on TWITTER or FACEBOOK
UPDATE:
I’ve also discovered that you Compress Your Audio Files using AUDACITY – the free open source software used by many audio geeks and podcasters alike. Again, quality seems to be fine, and is a quick and simple process. Not quite as feature-rich as Auphonic, but between Audacity & iTunes, I seem to be able to replicate all the necessary ins and outs 🙂
SHARE YOUR STORY TELLING MASTERPIECE
The final piece of the puzzle is to upload my files and share The Purple Coffee Podcast with the world wide web.
For the video, I use VIMEO, which is a sleek and cool competitor to Youtube. I wanted to separate The Purple Coffee Podcast from all of my other videos, so Vimeo is ideal. Uploading is easy, too, and although it can be done straight from Final Cut Pro, I tend to do this manually.
Simply upload the file, fill in the title and description, and press publish. There’s several customisable features, and you can embed your video on to your site or even Facebook.
As for the Audio version, I use LIBSYN, which is a hosting service that specialises in podcasts. If you want your podcast to appear on iTunes, you need to host it somewhere (as iTunes doesn’t host anything, merely connects RSS feeds). This does add a cost, but Libsyn is cheap and recommended by many podcasters and bloggers who have been doing this far longer than me (so far, I have no issues, either).
Again, upload your file, fill in the details, and grab the embed code to place on your website. Super quick. Super simple 🙂
PLACE YOUR STORY TELLING MASTERPIECE ON ITUNES
Like I say, iTunes doesn’t host podcasts, they merely grab data from elsewhere. The good news: it’s easy to get your podcast (so long as it’s hosted on something like Libsyn) on to the global marketplace. These are the steps to follow:
STEP 1
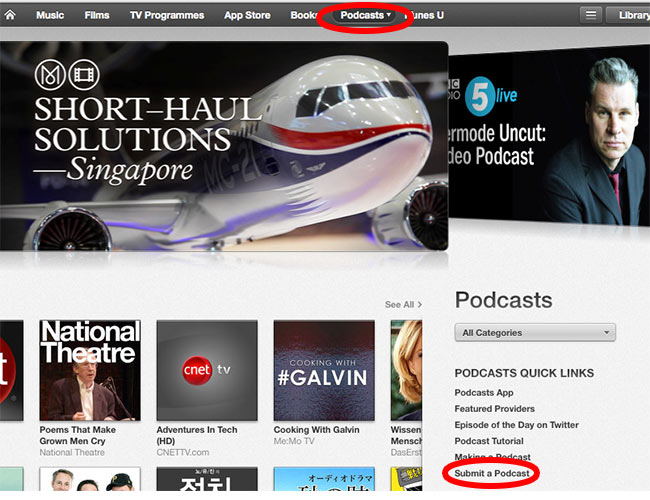
Open up the iTunes Store, and choose the PODCAST section in the menu running along the top of the page. Once this loads, a side menu appears down the right hand side, with a SUBMIT A PODCAST link at the bottom of it. This is the link you want to press 🙂
STEP 2
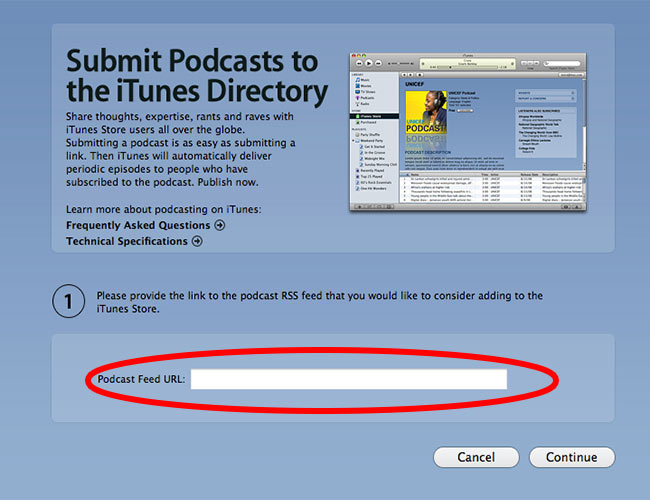
It will then ask you to login into your iTunes account (if you’re not already logged in), and takes you to this page. All you have to do is paste your PODCAST RSS FEED, which will be in your Podcast Hosting Account (Libsyn, Feedburner, your own site, etc…) ** it’s the file that ends in .rss – In my experience it’s easy to find (in Libsyn it’s located under the ‘Destinations’ Tab), but be sure to follow and step-by-step processes your hosting service provides **
Once you CLICK CONTINUE, you’re taken to a confirmation page which has all your Podcast info, such as cover artwork, title, and description. You cannot change these in iTunes, only from within your Podcast Hosting Setup. So, double check everything is okay (if not, alter them in Libsyn, or whichever hosting service you use) and PRESS SUBMIT.
HOWEVER, be warned, this submission process can take a little time. Apple usually takes 4-10 days to accept your podcast, and once they do, it can take another week or so to work out all the kinks. For example, it took nearly two weeks for my individual Podcast Sessions to show up on my Main Channel. I asked a few people why this was, and the response I received said: “It’s one of those mysterious Apple enigmas. Go figure…”
**Final Tip – Make sure you have at least 3 Episodes before you submit to Apple. If you have less than 3, you may be rejected**
CREATE YOUR BLOG POST & SHARE THE LOVE
Once all this is done, I create a page LIKE THIS ONE and share the love on Twitter & Facebook.
There you have it, cool cat. This is how The Purple Coffee Podcast is made. I hope all this info has been helpful, and hopefully you know a little bit more about my story telling ways. It isn’t a long process (usually two hours), and I have a lot of fun interviewing the amazing minds I do. I’m excited about the direction this will take me, and so far I love the podcasting world (especially seen as I do both video and audio).
I’d love to hear the tools you use for your podcast, or if you have any questions and would like to know some more details, please get in touch via TWITTER or FACEBOOK. If you feel I can provide a more in-depth step-by-step process for one of the sections, please let me know. I’m always happy to detail this further in future Blog Posts 🙂
Speak soon, you crazy misfit, you.
TURNDOG
